by Homer Dennis
Who has experienced this? You've got that important call or meeting with a client, or your boss on Skype. Maybe with your friend. The video call starts and your friend says 'hi'. Excited, you reply most enthusiastically. But your friend does not hear you. You speak again. Same response. On the other end, they are wondering if you are alive. If it is a video call, all they can see is your mouth moving. No response. Isn't that annoying?? And Frustrating? Yes it is!! Especially when it is a very important call.
Contents
However, you do not need to worry. You also don't need to buy another laptop or take it to someone for repair. There are ways to fix the problem by yourself at home. Thank GOD for the Internet and free information. You will save a lot of money. Unless it is a problem with the hardware, here is how to fix it yourself:
A lot of times, the issue with your microphone could be the driver. It is most important, and the first step to ensure it is alright. The Driver could be malfunctioning or is simply outdated. If it is outdated, it could be that you system has upgraded, leaving your microphone behind. It will cause a clash with the system, making it not to work properly. Whatever the problem, you need to check the status of the driver. To do this, follow the steps provided:
The microphone problems could also be due to sound settings. Your microphone may be working fine, but may not produce audible sound required for a call. There could be a problem with the speaker. Here is how you can fix this problem:
· Go to the ask bar on the lower right side of your screen.
· Right-click on the Speaker Icon.
· Click on Sounds
· There are a list of tabs. Select the Recording tab.
· Click on the Microphone Option
· A new tab will open for you. Click on 'Properties'. Alternatively, the Levels tab may be right beside your Recordings tab. It depends on your computer. When you see it, click it.
· Increase the Volume of 'Microphone' and 'Microphone Boost'
· Go to the Enhancement tab, right next to the Levels tab.
· Check the 'Immediate Mode' box. Ensure that it is ticked.
· Then Click 'OK' at the bottom of the tab.
When you are done, restart your device. Then check the microphone to ensure you are not having the same problem anymore.
Another way to get your Microphone to work is to use the microphone on your computers settings. When you go to your settings:
· Click on the Privacy Panel.
· Scroll Down and select 'Microphone'
· Select the option to 'allow apps to use your Microphone'. Apps may now easily capture your voice notes when you speak.
When you are done, check the audio. Test the microphone to see it is okay now.
You can also quick-start your Microphone by troubleshooting the problems of your sound system. Go to the tool bar on the left lower corner of your screen:
· Right-click on the sound icon
· Select the 'Troubleshoot sound Problems'.
Your computer will search and let you know what the problem is. It will also give you steps to follow to solve it.
Alternatively, if your device does not show the troubleshoot option on the sound Icon, you can:
· Type Win + I to open Settings.
· Click on the Control Panel . A new tab will open up.
· Scroll down through the computer settings. Then Click on 'Troubleshooting'. They are arranged in Alphabetical order, so it is one of the last on the list.
· When you click troubleshooting, another panel will open. Under the Hardware and Sound section, click on Troubleshoot Audio Recording.
· Another tab will appear. Ensure that the 'Apply Repairs Automatically' box is ticked. Then Press Next .
· Your computer will show you the problem, and how to fix it. Actually, it automatically fixes it if you allow it.
· Then restart your computer and check if it is properly working.
If you upgraded your system to a Windows 10 in 2018, it is likely your audio problems started after that. That is because with the upgrade, a lot of apps did not have access to your microphone or webcam. For example, Webcam or skype. That is why when you want to use it, it seems not to work. But in reality, your apps simply do not have access to it. To fix this problem:
· Click on your Start Menu. Open Settings.
· Click on Privacy. This will open up the Privacy Settings
· Select the Microphone Icon
· Click the Change button.
· Turn on the 'Allow Apps to Access your Microphone'
· Go through all the apps you want to have access to your microphones. If you don't want every one of them to have access, that is okay. You can select the ones that you want.
· Do the same process for your Webcam as well.
Sometimes, your microphone may not be the only problem. You might want to fix some audio problems as well. Not to worry. We have brought them to you and given you solutions to common problems experienced. Look through the given lists and see which ones apply to you best:
Sometimes, something may block the speaker outlet. It might also be covered in dust. All of these things can prevent sound from coming out normally. If there is something covering the speaker, you can remove it. If there's dust on your speaker outlet, gently wipe it away. Your speaker should be clearer now
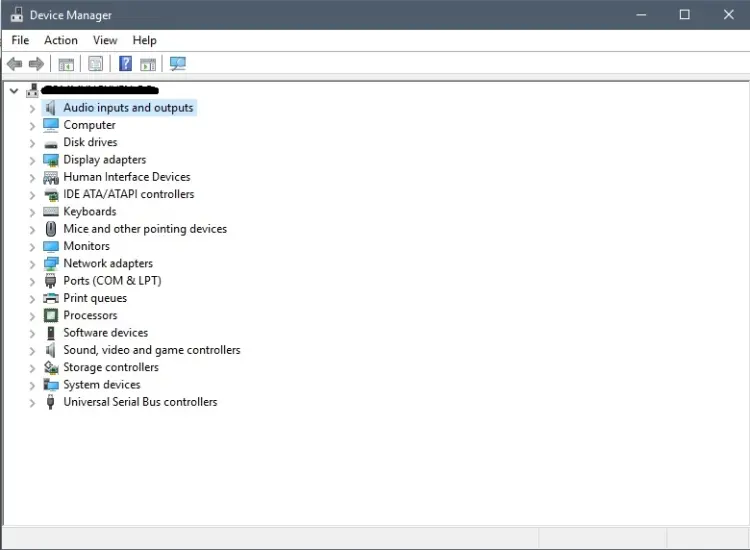
Another reason your sound is not working could be that your sound settings is not compatible with your windows. When this happens, it will not play at all. Here is how you can solve the problem:
· On your computer, under settings, Open up your Device Manager
· Click on Sound. (it has a loud speaker icon beside it)
· Right-click on your Realtek Audio Icon
· Uninstall your device.
· A panel will pop up, asking for confirmation. Make sure you tick the 'Delete the driver software for this device' box
· Click Uninstall
· After this, restart your computer. Your system will automatically re-install the audio. Check it out to see that it is working.
Minor changes to your audio device when customizing it changes the settings from default. This can cause the audio to start acting weird. In this case you have to restore it to its factory settings. Here is how you can do this:
· Go to the task bar on your laptop.
· Right-click on the Audio Icon. A tab will appear.
· Click on 'Playback devices'. Another tab will open.
· Click on the Playback tab. Ensure that a green tick is beside your Speakers/Headphones or your audio device.
· Click on 'Set Default'
· Then click on Okay.
At times, the devices we are using to listen to audio are faulty. The computer's sound is not necessarily the problem. If that is the case, remove your headphones/speakers from your computer. If the audio is works fine, then the problem is the microphone or earpiece. You may need to fix them to continue use.
Check your Headphone jack. It is possible an unknown object is blocking it, preventing you from hearing anything. If you do find something there, take a neat cloth. Gently wipe it out, or remove it. Do this gently so you don't damage your headphones. After this your headphones should be working fine and properly.
Whew!! It must be quite stressful not having your microphone or audio working. It is even more stressful when you cannot find the cause. We have outlined a list of common problems most people face and provided solutions to them. We hope they work for you. Now you can listen to your audios, make recordings or calls without stress. Thank you so much for staying with us again. Do have a great day!!

About Homer Dennis
Born and raised in an environmentally conscious family, Homer developed a strong awareness of the impact of human activities on the planet from a young age. This early exposure to eco-friendly practices and sustainability principles inspired her to pursue a career focused on promoting renewable energy and advocating for a more sustainable lifestyle.
 |
 |
 |
 |
Check These Out
Your lucky day! Visit FREE Gifts GiveAways for it. Whitelist the AdBlocker to get more Free Rewards
Then click anything below to proceed
|
|
|
|